SmartReport Technical Reference


Skip Navigation Links.
1 Introduction
Introduction

SmartReport™ is a comprehensive nuclear cardiology reporting program  developed by Dr. Larry Klein of POSMedIC LLC and Syntermed.  Syntermed, Inc.  serves as the distributor of the SmartReport™ application.  SmartReport™ can be used as either a stand alone application or as a totally integrated package with the Emory Cardiac Toolbox (ECTb™) application.  

The SmartReport ™ program provides a simple method for the physician to quickly and efficiently generate a nuclear cardiology report of the patient's myocardial perfusion and function.  Options are available to generate a normal or abnormal report either with a few clicks or by using the comprehensive tools provided in SmartReport
The phrases and structure in SmartReport were compiled based on the ASNC Imaging Guidelines for Nuclear Cardiology Procedures - Standardized reporting of radionuclide myocardial perfusion and function (http://www.asnc.org/imageuploads/ImagingGuidelinesReportingJuly2009.pdf).  User interaction involves selecting and entering comments and phrases from drop down boxes and entering text in edit boxes located within the various SmartReport menu screens.  This information is ultimately assimilated to generate the final patient's report.  The final report offers flexibility to be modified to an output specified by the user.  SmartReport executes on Mac OS, and Windows XP/7/8, system platforms. 

ECTb™ Integration - The SmartReport program can be obtained as a fully integrated application within the ECTb™ nuclear cardiology analysis program. The
ECTb program provides a method to automatically interpret the SPECT or PET nuclear cardiology study using an image support system (IDS) developed by Dr. Ernest Garcia at Emory University. Syntermed's Image Decision Support (IDS) program is a plugin for the 2nd generation application architecture that works directly with Emory Toolbox 4.0.  IDS extracts regional quantitative parameters of myocardial perfusion, reversibility, viability and function during the processing of the SPECT and PET studies within the Emory Toolbox 4.0. These regional parameters are converted to probability of abnormality (certainty factors) and submitted to a decision support algorithm that is updated with the latest scientific/clinical knowledge to reach an impression of the patient’s heart status. The IDS expert system is comprised of the knowledge base, the inference engine and the justification engine. The knowledge base consists of heuristic rules derived from domain experts. The conclusions reached by the IDS and justifications for each conclusion are used to automatically generate a structured report (SmartReport) for the diagnostician to review, learn from the justifications, and either modify and/or approve. This configuration also provides the capability of incorporating images and data generated by the ECTb™ application directly into the SmartReport ™ report.

SmartReport™ provides a cloud based, Client/Server application. This means that separate SmartReport™ clients can be located at the front desk, EKG room, and imaging room where data related to patient demographics, EKG, and imaging protocol can be entered by appropriate medical personnel eliminating the need for entry of this information by the physician, thereby reducing the time the physician needs to complete the report.
1.1 Launch SmartReport
Launching SmartReport - Integrated with Emory Toolbox

To launch SmartReport from the Emory Toolbox you will need to click on the Report button which is shown on the  navigation bar located on the left side of the display. The quantitative information from the study will then be sent to the IDS automatic interpretation system and these results will then be sent to SmartReport prior to launching the SmartReport application.


1.2 Setting Options
Setting Options

SmartReport has been developed to adhere to the reporting standards established by the American Society of Nuclear Cardiology (ASNC).  However, SmartReport does provide the ability to customize any of the drop down lists, report templates, or phrases within the application.  Since the program is based on the ASNC standards we recommend that new phrases be added and the existing phrases left as they are currently listed.  Changes can be entered for 6 categories: General, Personnel, Protocol(s), Locations(s), Report Template(s), and Lookup(s).

The changes to SmartReport are accomplished by going to the Edit/Options screen which is shown below. 

1.2.1 General
General


General
  • Confirm Delete -  if checked this option will present a dialog window when a study is going to be deleted.
  • Auto Import IDS Data - if checked the study interpretation generated by IDS in the Emory Toolbox will be imported into the perfusion window in a natural language format.
  • Display Window Size - if checked the existing window size will be displayed.
  • Automatically Save - save the report automatically if checked.
Perfusion / Defects
  • Show LVX Scores - if checked the automatic scores derived from IDS will be displayed on the polar maps.
  • Show Wall Controls - if checked the bars signifying the 7 walls of the heart around the polar map will be displayed and are active.  This allows the user to set all segments pertaining to a wall as abnormal with a single click.
Wall Motion / Thickening
  • Stress Only Reporting - if checked only the Stress study will be enabled on the screen for reporting.
  • Report Volumes - if checked the volumes generated by the Emory Toolbox will be displayed.
  • Only Report EF > 65% - if checked only the EFs > 65 % will be listed on the report.
  • Enable Wall Motion - if checked it will enable the wall motion polar maps so that the scores can be entered manually.
  • Enable Thickening - if checked it will enable the scores to be changed manually.
LL Miss to CSV... -
1.2.2 Personnel
Personnel

The user can manage personnel that will be associated with the patients studies at the institution by navigating to the Personnel tab in the Options dialog which can be accessed from the MCP application as shown below:


The main personnel screen listing all of the personnel is shown below.


If you want to edit an existing entry click on the pencil symbol.  If you want to add  new personnel then click on the New button and the following screen will be displayed.


The new personnel information should be added on this screen.  If you want to use a digital signature then click within the Signature box and you will be prompted to locate the digitized signature file on your system.   Once all of the information for the person is entered click the Save button.

Roles
In the dialog above, the personnel entry should be added to all applicable roles that the personnel will hold at the institution.

The list of Roles can be modified by changing the items listed in the "NuclearPerfusionPersonnelRoles" Lookup.
- The entries with "Enum Name" set to the following cannot be removed, but their "Display Name" can be changed:
  - PrimaryAttending
  - StressAttending

When the following tags are used in the report template, the information will be rendered as follows in the report.

[-Personnel-]
- Entries will be placed on lines based on category divided into the following groups:
  - If the "Enum" value of a Role contains "Attending"
  - If the "Enum" value of a Role contains "Referring", 
  - All other entires.
- Entries will be grouped together by the "Display Name" of the Role.
- If a line does not have any valid entries, it will be left blank.
- The Referrings line will always be last.

[-ReviewerName-]
- This will display the name of the Personnel selected in the PrimaryAttending Role.  If none has been selected, it will be left blank.

[-​StressSupervisorName-]
- This will display the name of the Personnel selected in the StressAttending Role.  If none has been selected, it will be left blank.


1.2.3 Protocol(s)
Protocol


The protocol option screen allows the user to either edit existing protocols or to add new ones for both Nuclear and Stress protocols.  ​All of the Nuclear and Stress protocols currently existing in the SmartReport database are listed on this screen.

The order in which the protocols show up in their respecitve lists in SmartReport can be modified using the up/down arrows for each list.  Please remember to hit the Save button before leaving this dialog.


Nuclear Protocol(s)
If you wish to create a new protocol then click on the "New..." button.  ​To edit a nuclear protocol, click on the pencil icon.   Fill out the available fields as described below and hit the "Save" button.


Display Name
This is the exact text that will be displayed in the list of Protocols in SmartReport.

Enum Name
This is an internal use, automated, required field that is a specially formatted representation of the protocol name.  This value cannot contain spaces or special characters (/, |, &, *, etc...) and cannot start with a number.  This value should only be used once per Site.

Modality
The default modalities are shown above, but can be modified by editing the "Modalities" lookup via the Lookups tab.  You may need to save and reopen the SmartReport options dialog for the changes to take effect.

Acquisition Type(s)
The default acquisition types are shown above, but can be modified by editing the "AcquisitionTypes" lookup via the Lookups tab.  You may need to save and reopen the SmartReport options dialog for the changes to take effect.  More than one can be selected.

Radiopharmaceutical
This drop down allows the user to select the radiopharmaceutical to be used in the acquisition.

AC Type
Allows the user to select which type of attenuation correction was used: Transmission or computed tomography (CT)

Multiple Day(s)
This field is not supported at this time.

Phrase
This is the phrase that will be filled in based on the values selected in SmartReport related to this protocol.  For simplicity, please copy/paste the phrase from a similar, pre-existing protocol and modify it as necessary.
 
[-TagName-]
All items in this format will be replaced with values from the SmartReport interface.  The appropriate values for each acquisition should be configured by replacing the keyword (in red) like in the example tags listed below:
 
[-NuclearProtocolDoseStress-]
[-NuclearProtocolDoseRest-]
[-NuclearProtocolDoseFDG-]

Other available tags are as follows:

[-StressProtocolSummary-]

[!-----INSTRUCTIONS-----!]
All items in this format should be modified at this time with the appropriate text.

All other text will be displayed as is in the report.

Visible
The protocol will be hidden from list in SmartReport when unchecked.

Stress Protocol(s)
If you wish to create a new protocol then click on the "New..." button.  ​To edit a nuclear protocol, click on the pencil icon.   Fill out the available fields as described below and hit the "Save" button.


Display Name
This is the exact text that will be displayed in the list of Protocols in SmartReport.

Enum Name
This is an internal use, automated, required field that is a specially formatted representation of the protocol name.  This value cannot contain spaces or special characters (/, |, &, *, etc...) and cannot start with a number.  This value should only be used once per Site.

Exercise
Check this box if the protocol has an exercise component.

Exercise Type
Select the exercise type from the drop down list.

Pharmacological
Check this box if the protocol has an pharmacological component.

Pharmacological Agent(s)
The default pharmacological agents are shown above, but can be modified by editing the "PharmacologicalStressAgents" lookup via the Lookups tab.  You may need to save and reopen the SmartReport options dialog for the changes to take effect.  More than one can be selected.

Phrase
This is the phrase that will be filled in based on the values selected in SmartReport related to this protocol.  For simplicity, please copy/paste the phrase from a similar, pre-existing protocol and modify it as necessary.
 
[-TagName-]
All items in this format will be replaced with values from the SmartReport interface.  The appropriate values for each acquisition should be configured by replacing the keyword (in red) like in the example tags listed below:
 
[-PharmaStressDoseDobutamine-]
[-PharmaStressDoseAtropine-]

Other available tags are as follows:

[-ExerciseDuration-]
[-StressProtocol-]
[-ReasonForExerciseTermination-]
[-ReasonExerciseCouldNotBeAttempted-]
[-ReasonForStressProtocolConversion-]

[!-----INSTRUCTIONS-----!]
All items in this format should be modified at this time with the appropriate text.

All other text will be displayed as is in the report.

Visible
The protocol will be hidden from list in SmartReport when unchecked.

Please remember to hit the Save button before leaving this dialog.
1.2.4 Location(s)
Location

The location option allows the user to set the name of the institution, address, phone number, etc.. The Location screen is shown below.


All of the current locations will be listed on the screen and they can be edited by clicking on the pencil symbol.  If you wish to enter a new location then click on the New button and the dialog shown above will be shown.  Enter the information for your institution on this screen and then click on the Save button.

1.2.5 Report Templates
Report Template(s)

The report template can be generated with this option and this screen is shown below.


The existing templates will be shown and can be edited by clicking on the pencil symbol.  If you are creating a new template then click on the New button and the following screen will be displayed.


The new template can be generated from this screen.  The name of the template is added first and then various defaults for protocols, location, hospital header, and physicians can be added.  Any text within [ ] means that it is a variable and cannot be changed.  The rest of the text can be changed and moved around to customize the template to the preference of the user.  Once you are finished with the template click the Save button and it will now be available within SmartReport.

1.2.6 Lookup(s)
Lookup(s)

The Lookup option allows the user to customize any of the lists contained within SmartReport. The Lookup screen is shown below.


The list of all of the Lookup tables are shown on the left column and the items associated with that Lookup table is on the right hand side.  You can edit any of the existing items by clicking on the pencil symbol and if you want to add a new item click on the New button.  Once the items are entered or changed click on the Save button and the new lookup table will be entered into the SmartReport database.
2 Report Screens
Report Screens

There are 8 screens used to complete a patients nuclear cardiology report which are described below.  The screens provide a combination of lists and drop down boxes containing phrases that are selected to generate the patients report.  The phrases and structure in SmartReport were compiled based on the ASNC Imaging Guidelines for Nuclear Cardiology Procedures - Standardized reporting of radionuclide myocardial perfusion and function (http://www.asnc.org/imageuploads/ImagingGuidelinesReportingJuly2009.pdf). The user is allowed to customize the reporting system using edit, add, or delete options for any of the phrases, lists, or statements in SmartReport and to customize the reporting templates.  The process for customization of SmartReport is covered in section 1.2 Setting Options.  The SmartReport screen is shown below. 


There are 4 options on the top bar: File, Edit, View, and Help

File - This option currently provides an option to Close the application.


Edit -
This option allows for selecting  Options for setting the preferences the user wants to use for SmartReport.  See section 1.2 Setting options for a discussion of how these values are set.


View -
This option allows for displaying the values used for the IDS automatic interpretation algorithm and for displaying the Polar Map Guide.


IDS Value(s) - this screen is shown below.


Polar Map Guide
- this screen is shown below and represents the polar map diagram with a drop down list which demonstrate the various configurations for the polar map.


Help - this option is used to display the User Manual.

The 8 screens that are used to create the nuclear report are described below.
  1. General
    • The General screen is used to enter patient demographics, indications, risk factors, medications, past cardiac procedures, physicians, height, weight, etc..  The patient demographic information is imported from the Emory Toolbox and the rest of the page can be filled out by the secretary or technologist prior to imaging the patient.
  2. Protocol
    • The Protocol screen contains information related to the imaging and stress protocol used, doses injected, level of exercise, hemodynamics, and technical quality of the study.
  3. Baseline (EKG)
    • This screen allows the user to enter the results of the patients baseline EKG.
  4. Stress (EKG)
    • This screen allows the user to enter the results of the patients stress EKG
  5. Perfusion / Defect(s)
    • The results of the patients perfusion defect is entered on this screen.  If SmartReport is integrated with the Emory Toolbox then the automatic interpretation generated by IDS is imported and populated on this page in SmartReport.
  6. Wall Motion / Thickening
    • The Wall Motion / Thickening page allows the user to enter the wall motion interpretation for the 17 walls of the heart.  The thickening information is automatically populated from the IDS output if SmartReport is integrated with the Emory Toolbox.
  7. Conclusion(s)
    • Conclusion statements related to what the user wants to enter into the report for the patients is completed on this screen.
  8. Report
    • The final report is displayed containing all of the values entered in the previous 7 screens.

2.1 General
General Screen

There are 4 areas which need to be completed on this screen: Height and Weight, Personnel information, Indications, Risk Factors, and Past Cardiac Procedures (if any).  The patient demographics (name, number, dob, study date, etc.) have previously been entered from the MCP program.  The areas which require user interaction are discussed below.


Height and Weight - The patients height in inches and weight in pounds should be entered into the appropriate edit boxes.  The height and weight are then converted to centimeters and kilograms automatically.  The body mass index (BMI) and body surface area (BSA) is then automatically calculated from the height and weight information.

Personnel Information - The names of the physicians involved in the study can be entered here from drop down lists.  If the physician is not in the database then they can be added by clicking on the + symbol.  When this is clicked the personnel search screen will be displayed and is shown below.

First choose the desired Role for the new Personnel to hold in the report, then choose the appropriate entry.  The user has the ability to add a Personnel entry at this time via the "New..." button if necessary.


Note: There can only be one Personnel entry per report for PrimaryAttending and StressAttending.

Note: If no StressAttending is selected, but the report template uses related tags, the selected entry for PrimaryAttending will be displayed automatically in its place.

Indications - The Indications box presents a list of indications which can be selected by clicking on the indication which will then show up in the Indications box at the bottom of the screen.  Everything listed in the boxes at the bottom indicate information that is going to be entered into the patients report. If you would like to enter different indications then this can be done by going to Edit/Options/Lookups and then select Indications from the list in the left column.  When this is done the screen below will be shown. You can then delete or add new indications to the list. 


Risk Factors - The Risk Factors box presents a list of risk factors which can be selected by clicking on the risk factor which will then show up in the Risk Factors box at the bottom of the screen.  Everything listed in the boxes at the bottom indicate information that is going to be entered into the patients report. If you would like to enter different risk factors then this can be done by going to Edit/Options/Lookups and then select Risk Factors from the list in the left column.  When this is done a screen similar to the Indications screen shown above will be displayed. You can then delete or add new risk factors to the list.

Past Cardiac Procedures/Other Conditions/Medications  - If the patients had any previous cardiac procedures, other conditions or medications that you would like listed in the report then these items can be selected from the related screens.  If you would like to enter different information for any of these areas then this can be done by going to Edit/Options/Lookups and then select Medical History Procedures, Other Conditions, or Patient Medications from the list in the left column.  When this is done a screen similar to the Indications screen shown above will be displayed. You can then delete or add new entries to the list to the list.


2.2 Protocol
Protocol

The protocol screen is used to enter the nuclear and stress protocol used for the acquisition and stress of the patient.  The protocol screen is shown below.


Nuclear Protocol - Most of the nuclear cardiology protocols used in nuclear labs for imaging patients are listed in the Nuclear Protocol box.  Click on the protocol which you are using for the patient and the text that is used for protocol will be listed in the Protocol Phrase Preview box. Any of these protocol names or text used can be edited and this is accomplished by going to Edit/Options/Protocol(s). Instructions for editing the protocols is explained in section 1.2 Setting Options.

Nuclear Doses - the technologist needs to enter the rest and stress doses in the nuclear doses box.  If the doses are not entered then when the final report is generated it will notify the physician that the doses were not entered since this is a Required variable.

Normal - the normal check box is used if the study is normal.  This will automatically put in preset phrases for nuclear perfusion, wall motion, and conclusion.  These phrases can be edited by going to Edit/Options/Lookups and selecting NormalPhrases and Normal/AbnormalConclusions from the left hand list and then selecting the item that will be edited located in the right hand list.  Instructions for editing the protocols is explained in section 1.2 Setting Options.

Stress Protocol - Most of the stress protocols used in nuclear labs for stressing patients are listed in the Stress Protocol box.  Click on the protocol which you are using for the patient and the text that is used for protocol will be listed in the Protocol Phrase Preview box. If it is a Bruce protocol then the Exercise boxes will be enabled and if it is pharmacological stress then the Pharmacological Stress box will be enabled. The Hemodynamics are entered for both methods of stress in the Hemodynamics boxes.  Any of these protocol names or text used can be edited and this is accomplished by going to Edit/Options/Protocol(s). Instructions for editing the protocols is explained in section 1.2 Setting Options.

Technical Quality - Entries related to the technical quality of the study are entered in this section.  These have to do with TID, overall quality, motion, adjacent gut activity, lung uptake and attenuation.

Comments - the user can enter and comments into this box and it will be displayed in the final report in the Protocol section of the report.

Location/Template Bar

The bottom of each screen contains a method that allows the user to select the location and template that are to be used for the study. The bar is shown below.


Location / Facility -  is used to list the name, address, phone, etc. for the facility. The method for generation of the Location and Facility information is described in section 1.2 Setting Options.

Save - is used to save the information entered in the particular screen.  Note: this is done automatically once you leave a screen.

Save and Close - this is used if you want to close out of SmartReport before the report is completed.

Report Template - these are the report templates set up by the site which is accomplished by going to Edit/Options/Report Template(s).  The method for generation of the report templates is described in section 1.2 Setting Options.

2.3 Baseline (EKG)
Baseline (EKG)

This screen allows the user to enter information related to the results of the patients baseline EKG.  This screen is shown below.  Information can be entered related to Rhythm, Axis, QRS, Q Waves, ST Segment(s), Misc, ST Segment Changes and Arrhythmia(s).  The information selected from these sections will be displayed in the left and right hand boxes at the bottom of the screen and this is the information that will be entered into the final report. Any of the phrases listed on this page can be edited or new phrases created by going to Edit/Options.Lookup(s) and go to the particular item listed on the left hand column, then edit the particular entry listed on the right hand column.  This editing process is described in section 1.2 Setting Options.


2.4 Stress (EKG)
Stress EKG

This screen allows the user to enter information related to the results of the patients stress EKG.  This screen is shown below.  Information can be entered related to Common Symptoms, Chest Pain, Other Symptoms, ST Segment Changes and Arrhythmia(s).  The information selected from these sections will be displayed in Stress Symptoms box on the right and in  the left and right hand boxes at the bottom of the screen and this is the information that will be entered into the final report.  There is also a box for entering the Hemodynamic, Clinical and ECG response into the Conclusion section of the report. Any of the phrases listed on this page can be edited or new phrases created by going to Edit/Options.Lookup(s) and go to the particular item listed on the left hand column, then edit the particular entry listed on the right hand column.  This editing process is described in section 1.2 Setting Options.

2.5 Perfusion/Defect
Perfusion/Defect

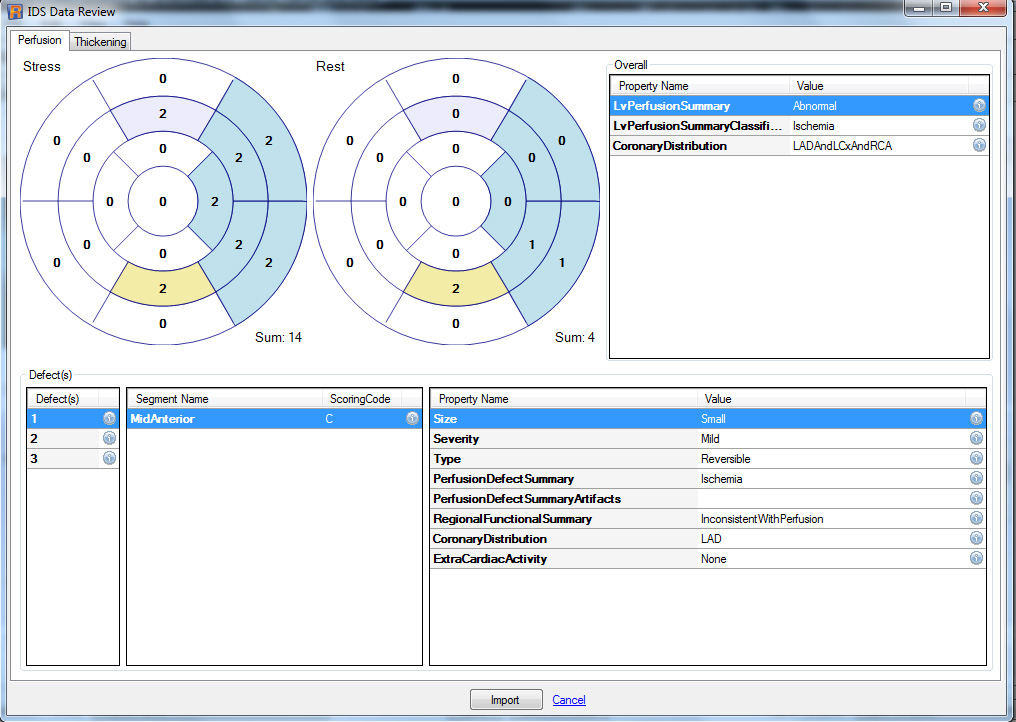
The Perfusion/Defect screen is used to enter the interpretation of the patients nuclear myocardial perfusion.  If SmartReport is integrated with the Emory Toolbox then the initial interpretation is automatically generated from Image Decision Support (IDS) system and imported into SmartReport and that will be the initial interpretation listed on the screen which is shown below.


Show Overlays - if checked the 17 segment overlays are displayed on the stress, rest and defect diagram polar maps

Show Scores - if checked the scores ranging from 0 - 4 that are automatically generated from IDS are displayed within the 17 segments of the stress and rest polar maps.

Normal Perfusion (No Defects) - if this box is checked then the study will be set to normal and the default text for perfusion, wall motion, and conclusions will be used in the report.  To set these normal statements you need to go to Edit\Options\Lookup(s) and select the proper item in the list on the left.  See section 1.2 Setting Options

Defect Diagram

The defect diagram shown below indicates the location of the defect within the 17 segments or the 7 walls (6 outer blue bars and apex). 


In this case there are 3 different defects located by the IDS automatic interpretation and the different defects are indicated by the 3 different colors within the 17 segments.  Any of the segments defects can be removed by clicking on the segment and then a dialog window will come up asking to confirm the deletion.

Defect Table

The defect table list(s) the defect , segment, and Code for each defect.


Defect - To move between the defects click on the number listed in the Defect column.  When this is done the information related to the defect will be changed to indicate the text associated with that defect in the Defect Phrase Preview and all of the drop down boxes will be updated to reflect the status of this defect.

Segment - the segment indicates which segment within the defect selected is has a perfusion abnormality.  If you click on the x symbol it will remove the defect from the study.

Code - the code column represents 1 or 2 letter codes that indicate the status of the perfusion defect and these codes are described in the two columns to the right.  If you select a code in the All column it will set all segments for that defect to that perfusion status. If you select a code in the One column it will only set the one segment highlighted in blue to that perfusion status.

IDS - This will display the results of the Decision Support System which automatically interprets the patients study.  The screen is displayed below and contains the interpretation for perfusion and thickening.  These results are converted to text and entered into the report.


Clear All - this will clear all of the defects and related information.

Drop Down Lists

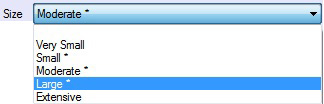
The drop down lists provide a quick way for the size, probability, cause and coronary to be entered into the report.  Note: any words with an * indicate that these are words that have been selected by the American Society of Nuclear Cardiology as being acceptable for generation of a nuclear cardiology report. 


Size - the options for size can be entered from the drop down list shown below.


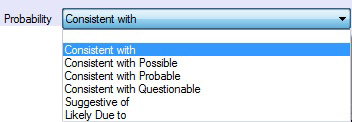
Probability - the options for probability can be entered from the drop down list shown below.


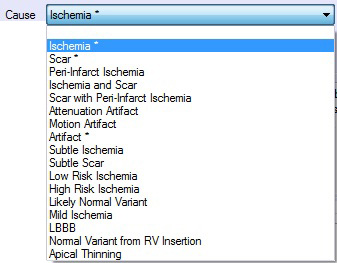
Cause - the options for cause can be entered from the drop down list shown below.


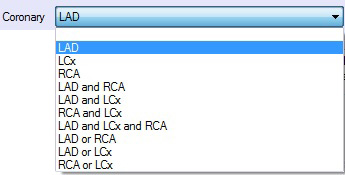
Coronary - the options for coronary can be entered from the drop down list shown below.


Severity - 
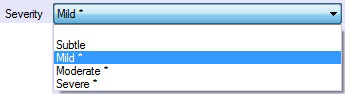
the options for severity can be entered from the drop down list shown below.


The smaller drop down box allows for entering additional phrases and the options for this box are and, or,


There is also a third smaller drop down box to which allows for adding in a third category for the study and it also provides for and, or, and/or.

Defect Phrase Preview - this box lists the text describing the text in natural language which is how it will be listed in the final report.


Comments - this box allows for entering in any comments in free text which the user would like to be entered into the perfusion section of the final report.

Overall Perfusion Comments - this box allows for entering in any overall perfusion comments that will be entered into the final report.


2.6 Wall Motion/Thickening
Wall Motion/Thickening

The wall motion and wall thickening screen allows the user to enter the 17 segment scores for wall motion and wall thickening for stress and rest.  This screen is shown below.


Wall Motion Polar Maps - the wall motion polar maps are the two maps at the top of the page with stress on the left and rest on the right.  These maps allow the user to enter a score for wall motion in each of the segments.  This is accomplished by clicking on the center of the segment and a drop down list will be displayed.  Select the wall motion score which pertains to a wall motion status and that value will be displayed in the segment.  These polar maps are enabled by checking the stress and/or rest box at the top of the polar map.

Thickening Polar Maps - the thickening polar maps are the two maps located below the wall motion polar maps.  These values are initially automatically generated by IDS in the Emory Toolbox imported into the 17 segments for stress and rest.  The values can be changed by clicking on the number in the segment and a drop down list will be displayed allowing the user to change the score.  The scores and corresponding thickening status statement is shown in the Thickening box.

Update Button - when any changes are made to the 17 segments scores in any of the polar maps you must click on the Update button in order for these changes to be entered into SmartReport for the patients study.  Note: if the Update button is yellow that means that the values have been changed from the automatically determined IDS values.

Clear All Button -  if this button is clicked it will clear all of the values currently stored for Wall Motion and Wall Thickening on the current screen.

Global LV Function - the drop down list with items that can be selected related to Global LV Function is shown below.


LV Size - the drop down list with items that can be selected related to VV Size is shown below.


RV Function - the drop down list with items that can be selected related to RV Function is shown below.


RV Size - the drop down list with items that can be selected related to RV Size is shown below.


Septal Wall Motion - the drop down list with items that can be selected related to Septal Wall Motion is shown below.


Possible RV Hypertrophy - this box is checked if the patient is suspected of having RV Hypertrophy.

The Ejection Fraction (EF), End Diastolic Volume, and End Systolic Volume which are imported from the Emory Toolbox are listed under both the Stress and Rest Polar Maps.

Stress Drop Down List - This drop down list allows the user to enter phrases associated with the stress EF and the list is shown below.


Rest Drop Down List -This drop down list allows the user to enter phrases associated with the rest EF.


Comments - this area is used to enter any free text related to the patients wall motion or wall thickening and this text will be entered into wall motion section of the patients final report.

Phrase Preview - all of the values or statements entered into this screen will be converted to natural language and displayed in the Phrase Preview window.  The phrase preview window is shown below.


2.7 Conclusion
Conclusion

The conclusion screen contains phrases that can be selected to enter into the conclusion section of the final report. This screen has conclusion statements for the following categories: All, Comparison, Attenuation, Non Cardiac, Wall Motion, High Risk, and Recommendations.  All of these phrases can be modified or new ones added by going to the Edit\Options\Lookup(s) screen, see section 1.2 Select Options for an explanation of how to edit or add new values to the lists.  The Conclusion screen is shown below.

2.8 Report
Report


The report template that will be used for the patient report is shown on this screen.  This template can be customized by the user by going to Edit\Options\Report Template(s).  This process is explained in section 1.2 Select Options and the report screen is shown below.


Finalize - click to to finalize the report and enter if the physicians digital signature.

Print - allows for printing the report

Plain Text - allows for a plain text file of the report to be created.


WORKING COPY